Electric Vehicles
Electric Skateboard
Components
- Board
- Trucks
- Wheels
- Motors
- Gears and Belt
- Battery
- Speed Controller
- Radio Controller and Reciever
- Spark Switch
- Battery Enclosure
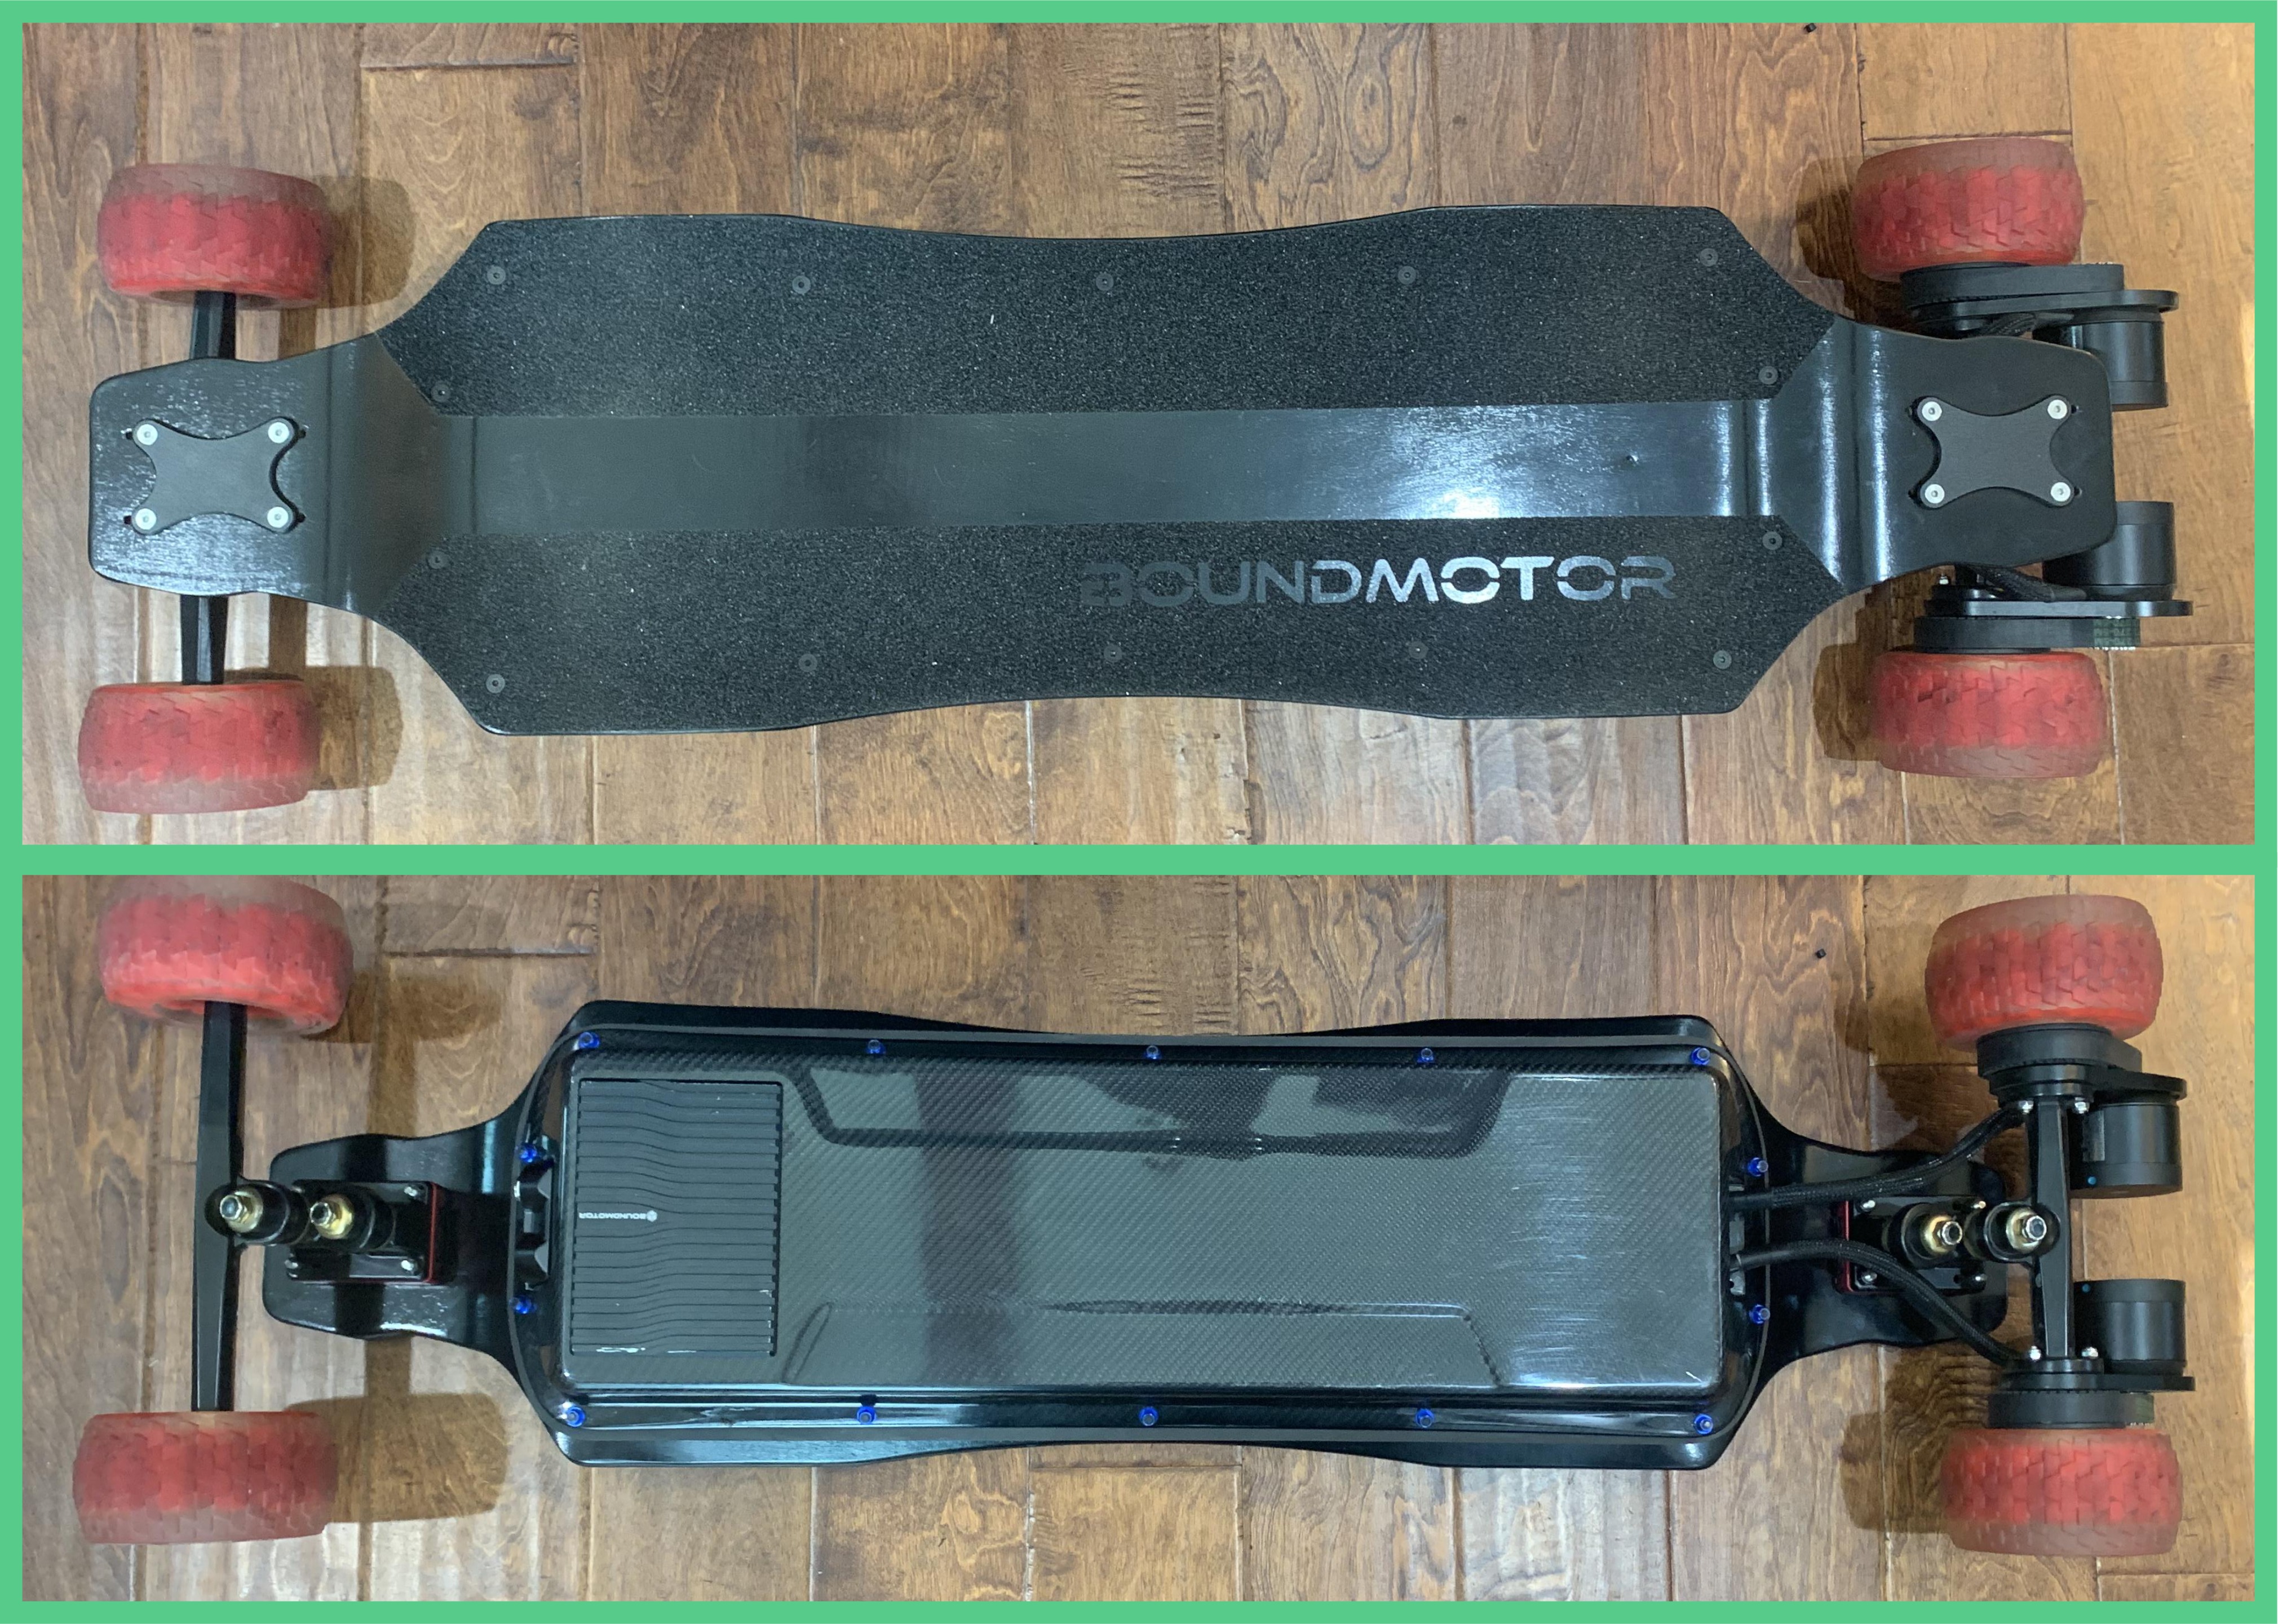
Battery Build
The battery pack was made with Samsung INR18650-30Q lithium-ion cells. The pack configuration is 14s4p (4 parallel connections of 14 series connections) composed of 56 cells. Nickel strip was used to make electrical connections between cells. A spot welder was used to fasten the nickle strip. It is common practice in battery assmebly to use a spot welder instead of solder to reduce the amount of heat exposure to the lithium-ion cells.
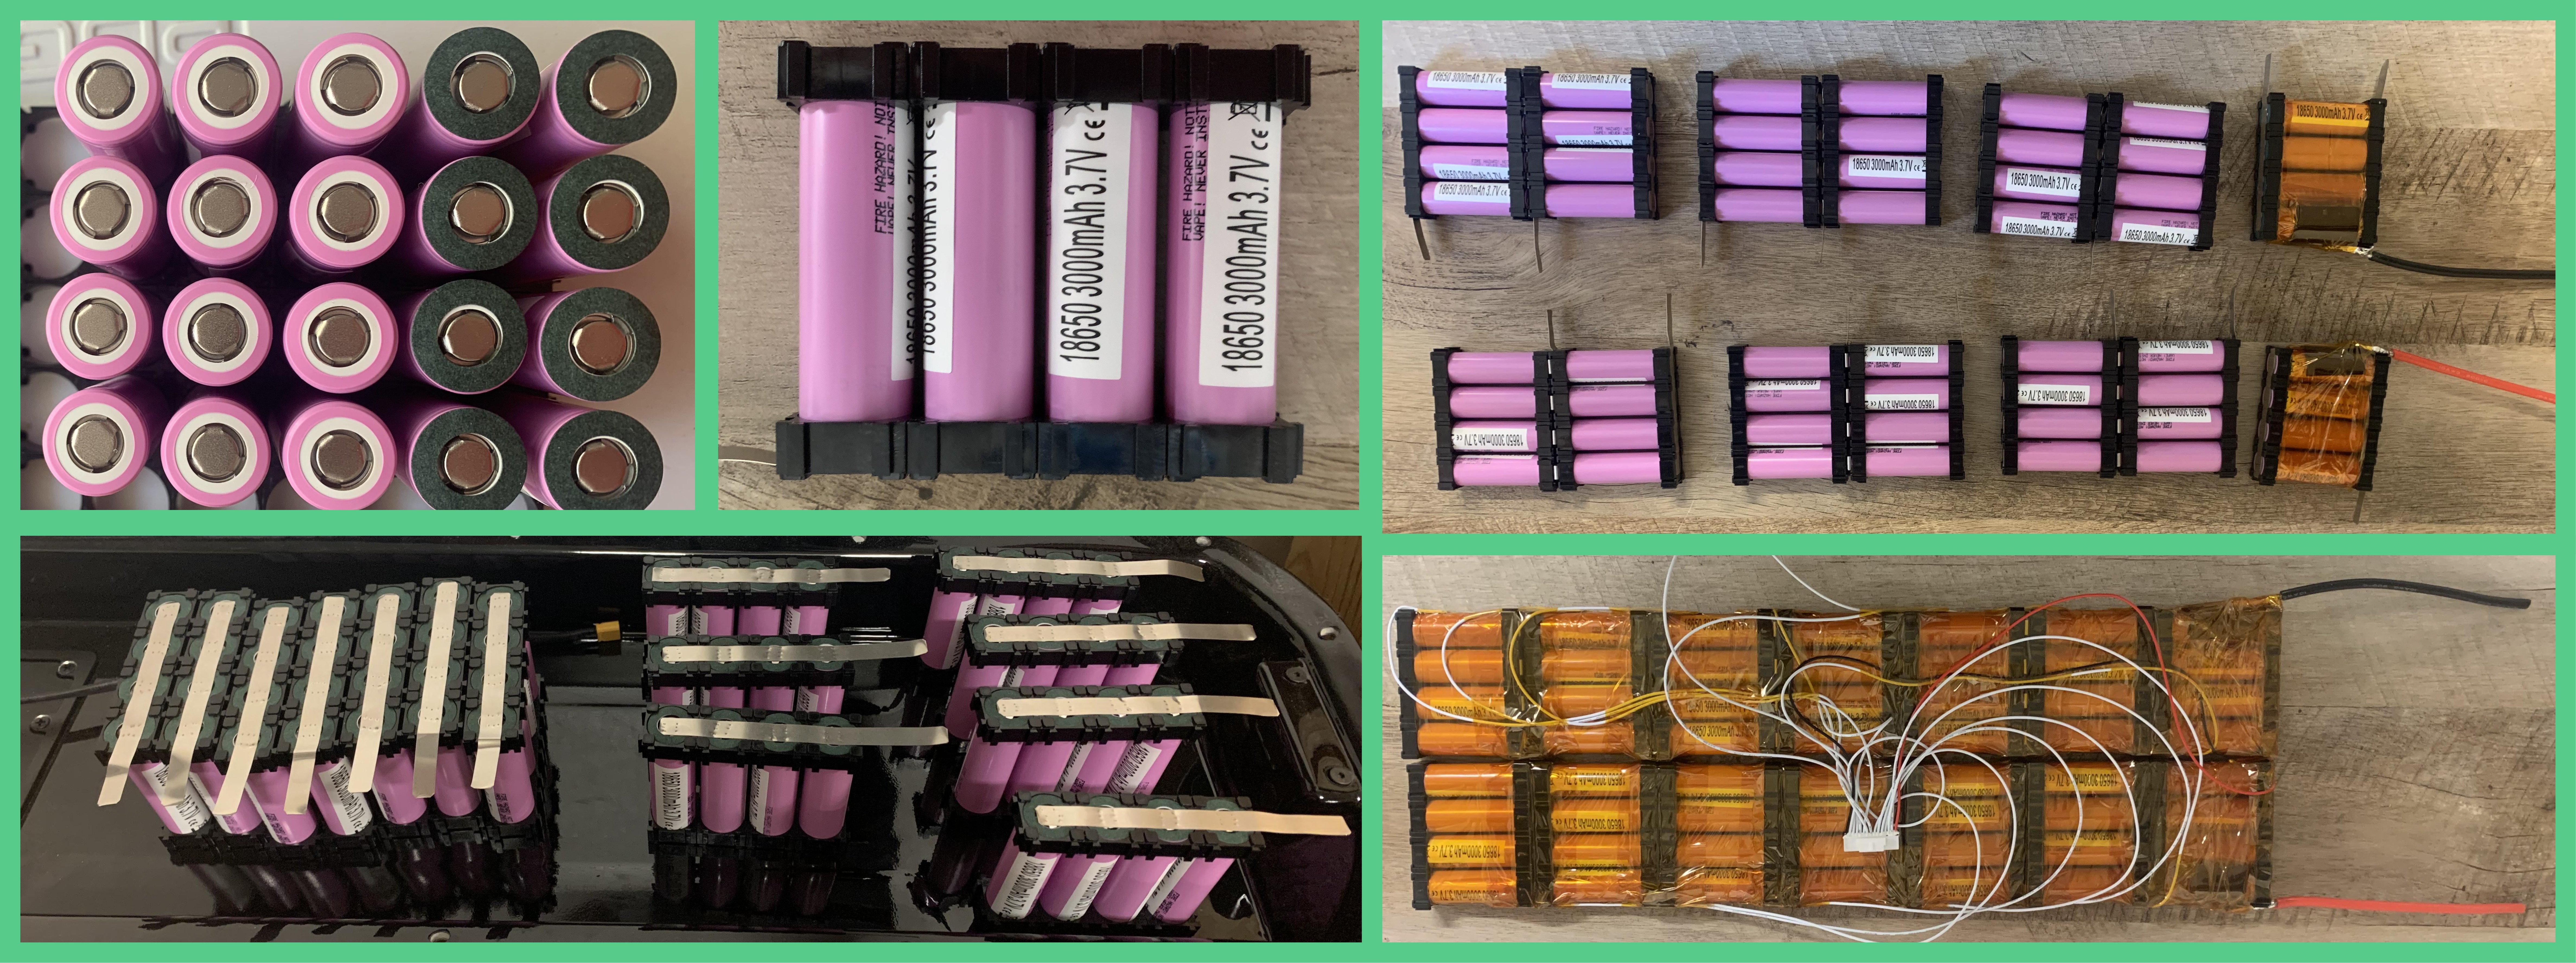
Assembly
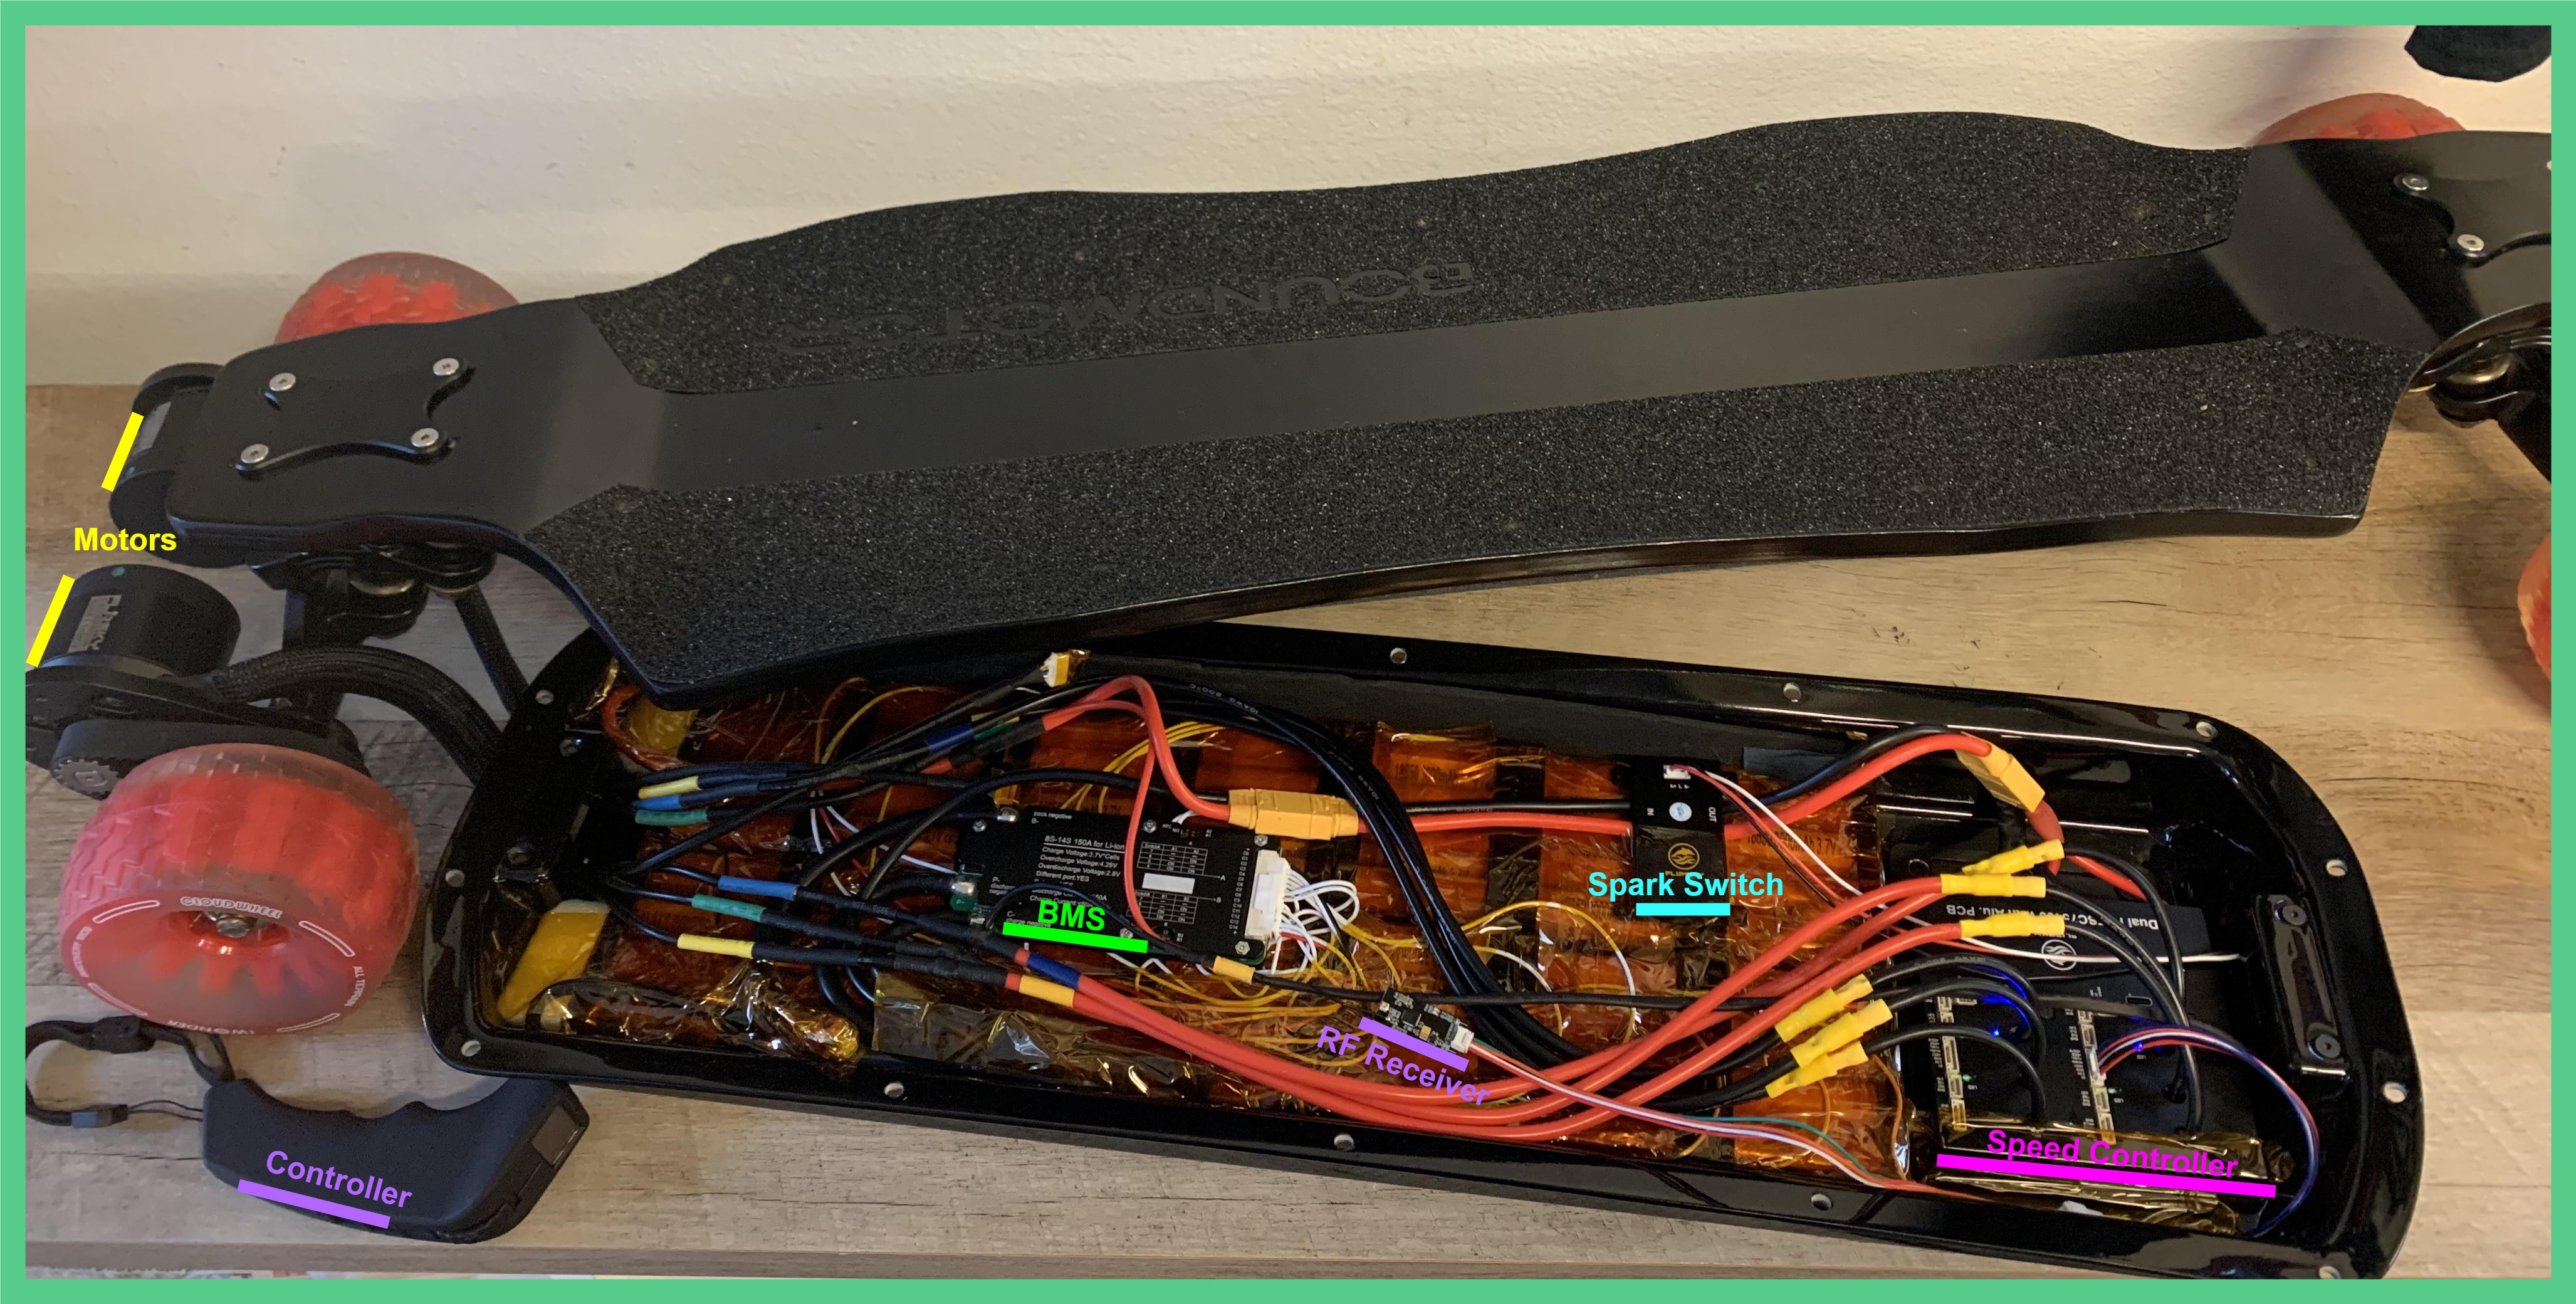
BMS: Battery Management System. Connects between the the negative terminal of the battery and the negative lead of the speed controller. The BMS also has a port for the negative charge lead of the charging port. The BMS performs cell balancing and protects against dangerous temperatures, overcurrent, undervoltage, and overvoltage.
RF Reciever: Allows communication between the remote controller and speed controller.
Spark Switch: Connects between the battery and the speed controller and prevents sparking when turning the skateboard on.
Speed Controller: Connects between the spark switch and the motors. Controls the power to the motors based on inputs from the RF reciever.
Programming

The speed controller was programmed using VESC (Vedder electric speed controller) Tool which is an open source software for programming VESC speed controllers. Certain characteristics of the board have to be specified when programming with the VESC Tool so that the speed controller operates properly. Below are the specifications entered into the VESC Tool for the board.
| Parameter | Value |
|---|---|
| Number of Series Connections in Battery | 14 |
| Battery Capacity | 12000 mAh |
| Wheel Diameter | 120 mm |
| Motor Poles | 14 |
| Max Battery Current | 55 A |
| Gear Ratio - Motor/Wheel | 15/40 |
The skateboard has not been fully tested yet, but the table below shows some of the performance metrics I have found.
| Parameter | Value |
|---|---|
| Top Speed | 30 mph < |
| Max Distance | 15 miles < |
| Weight | 33 lbs |
| Acceleraton | N/A |
The fastest I have gone is 30 mph but I do not have enough confidence to go faster yet. I have ridden for more then 15 miles on a single charge and the battery gauge was still above half, so it may be possible to ride 30 or more miles on a charge, but it has not been tested.
Electric Bicycle
Overview
Converted an old bike into an electric bike using a commerically available kit. The kit included a motor, throttle, breaks, and a control box to connect all the components together. The bicycle was powered by a lithium-ion battery pack made from lithium-ion cells.
Components
- Old bicycle frame
- Conversion Kit
- Lithium-ion battery pack
Battery Build
The battery pack was made with Samsung INR18650-30Q lithium-ion cells. The pack configuration is 11s3p (3 parallel connections of 11 series connections) composed of 33 cells. Nickel strip was used to make electrical connections between cells. A spot welder was used to fasten the nickle strip. It is common practice in battery assmebly to use a spot welder instead of solder to reduce the amount of heat exposure to the lithium-ion cells.
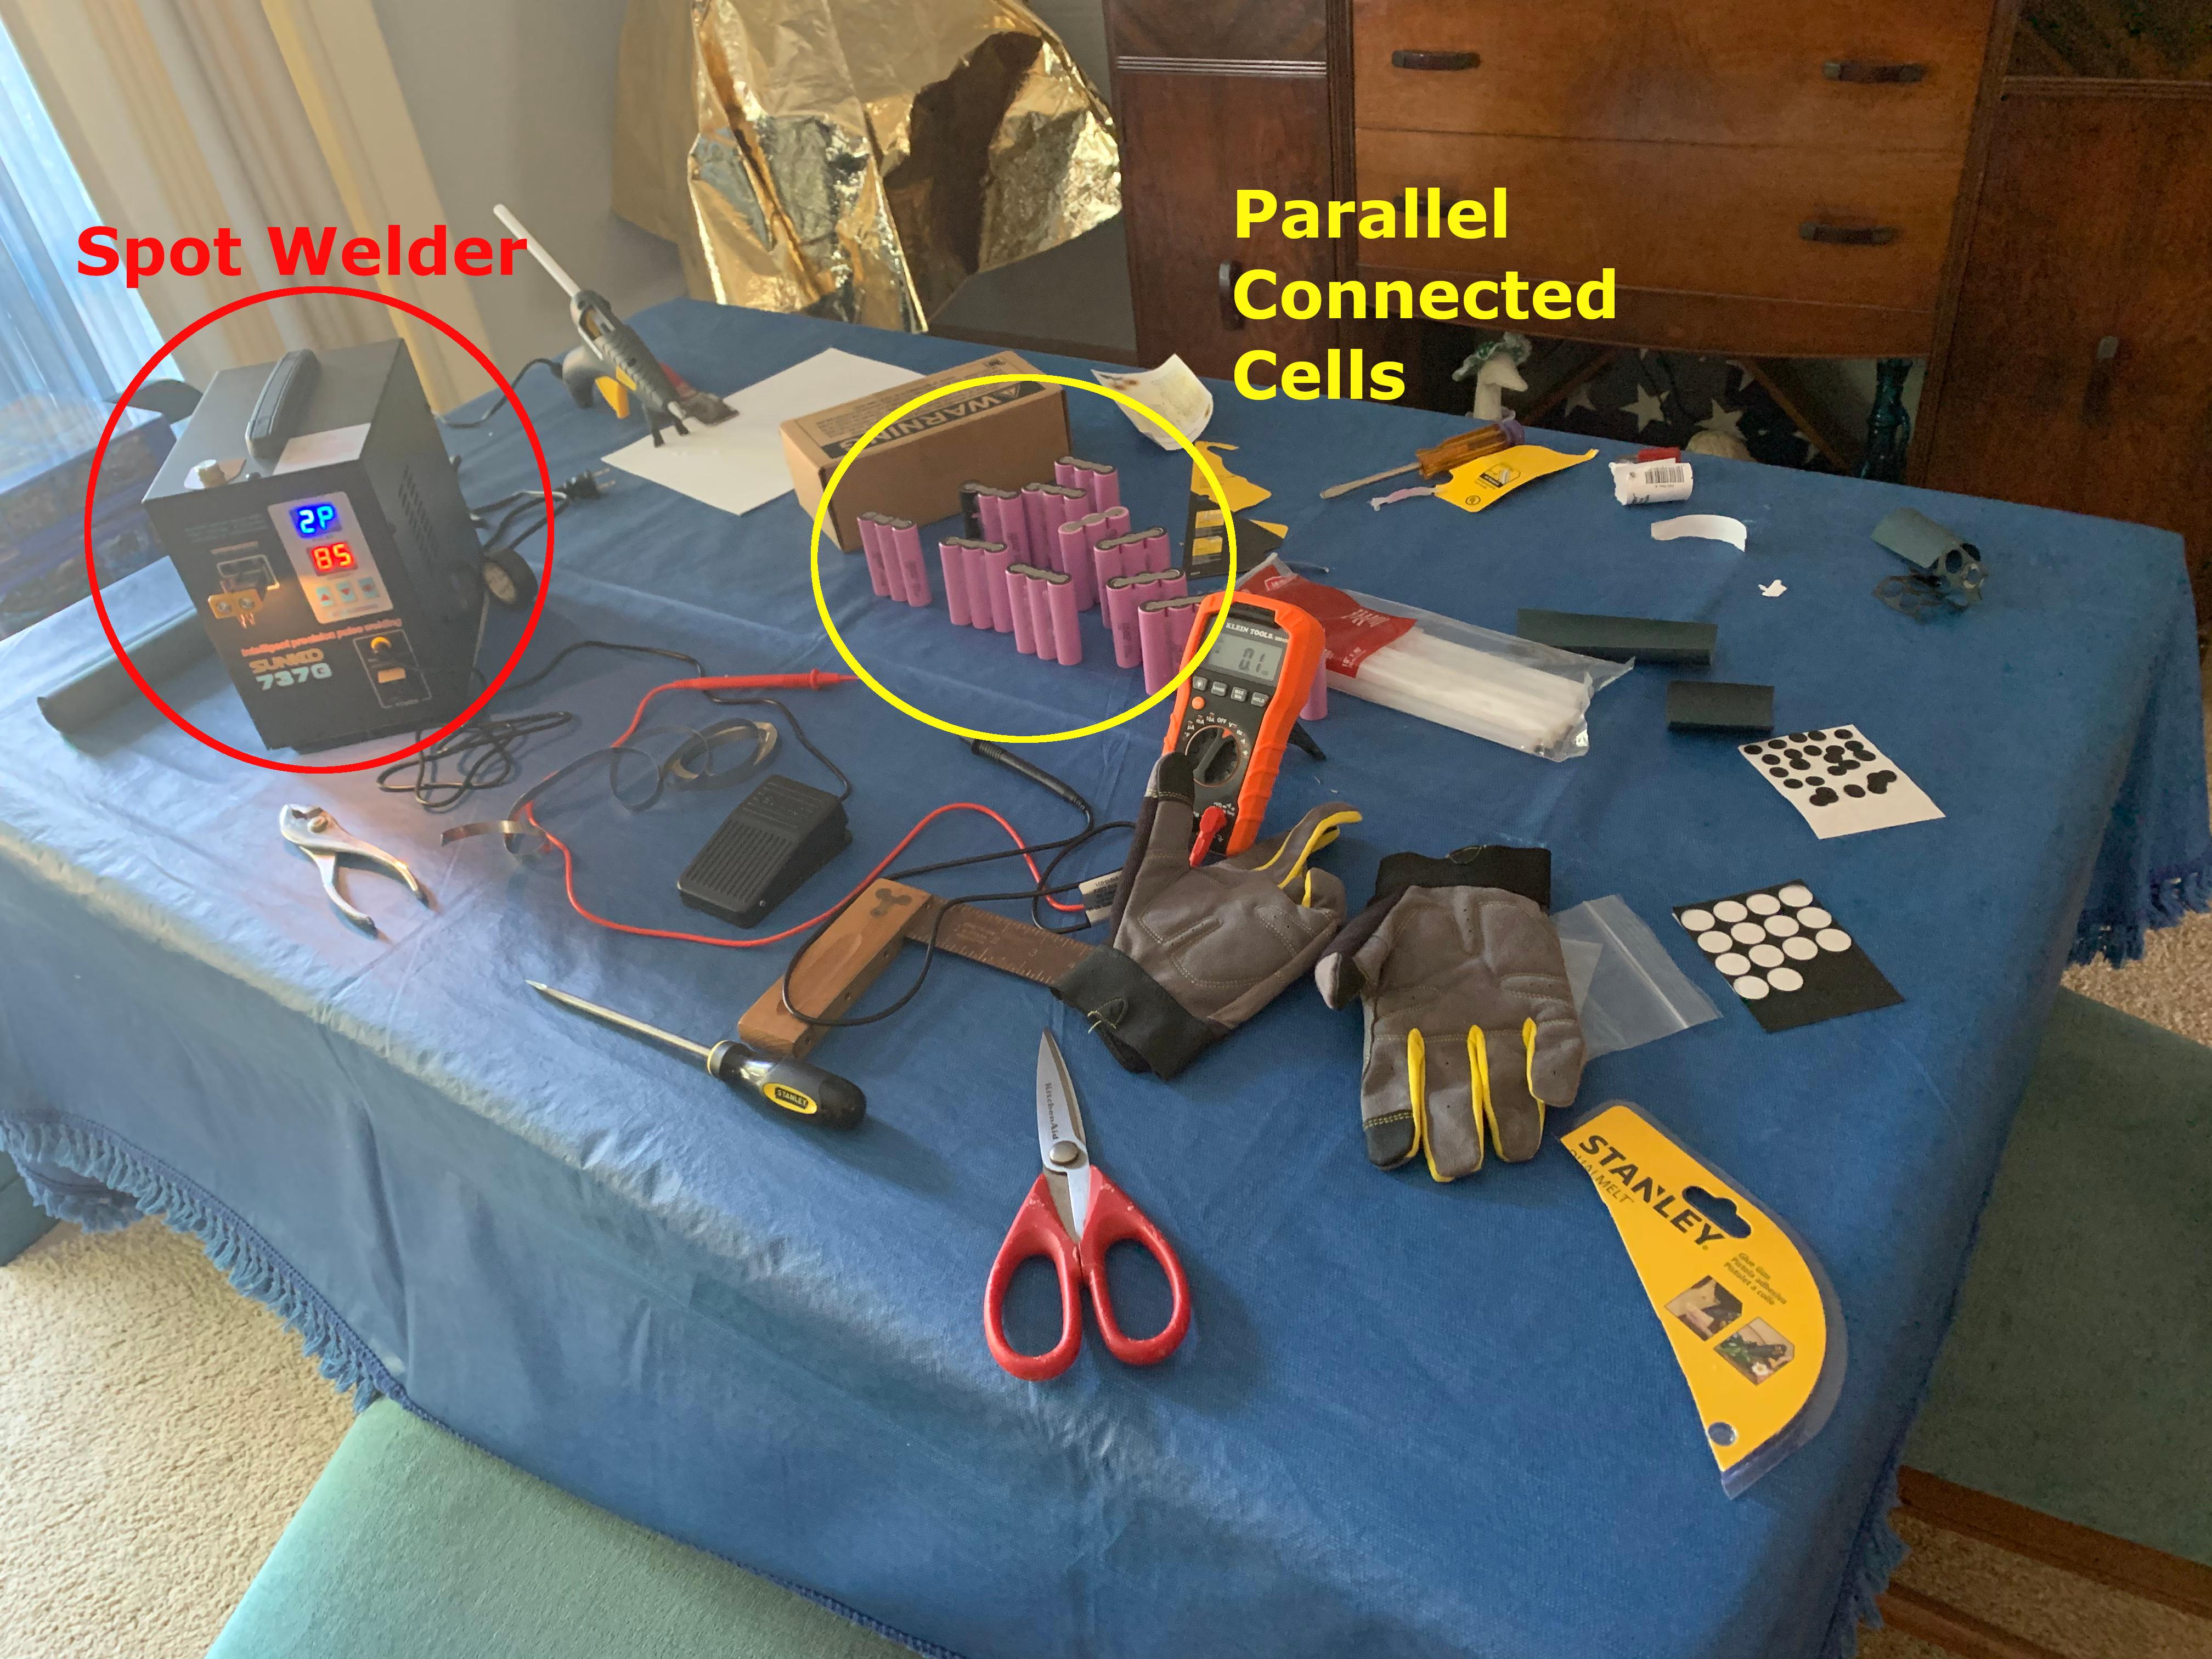 Figure 1: Workstation Setup
A commercial BMS was attached to the battery pack to add protections and controlled charging and discharging to the battery pack.
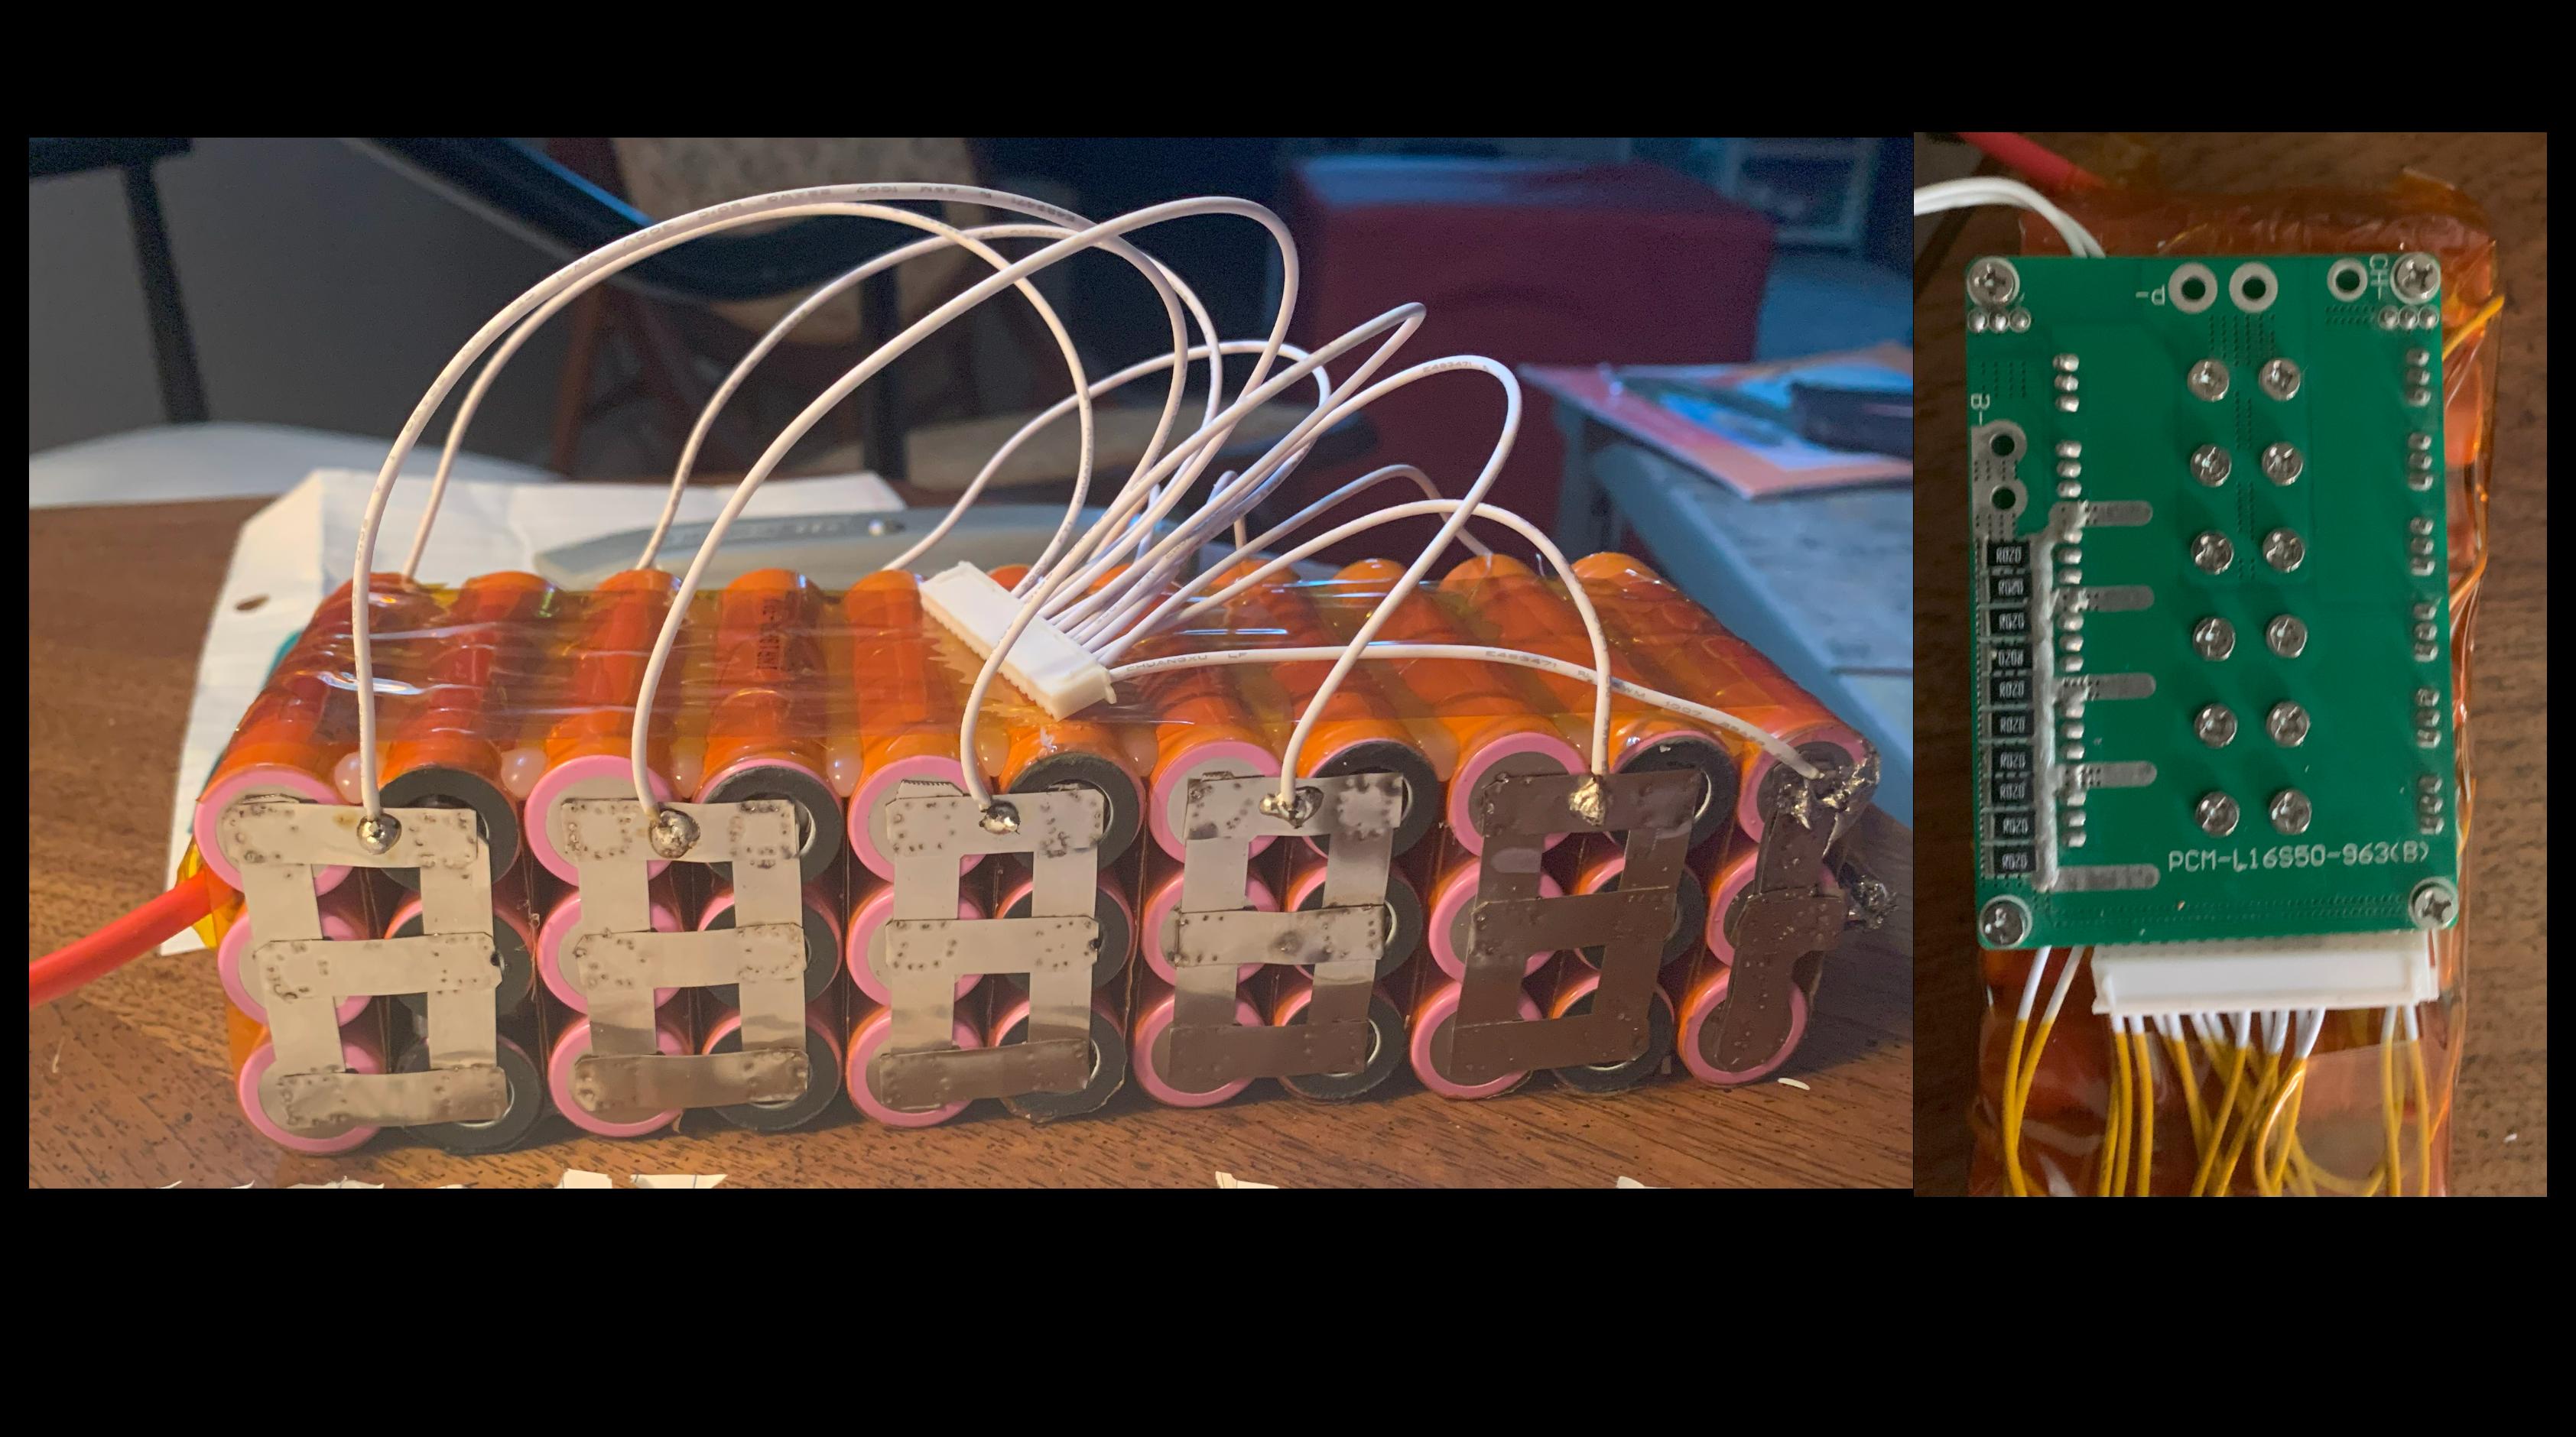 Figure 2: Left image shows battery with balancing wires and image of the right shows the balancing wires plugged into the BMS
The battery pack was wrapped in polyimide tape to electrially instulate it. I 3D printed a box that could be fastened to the bicycle frame with screws.
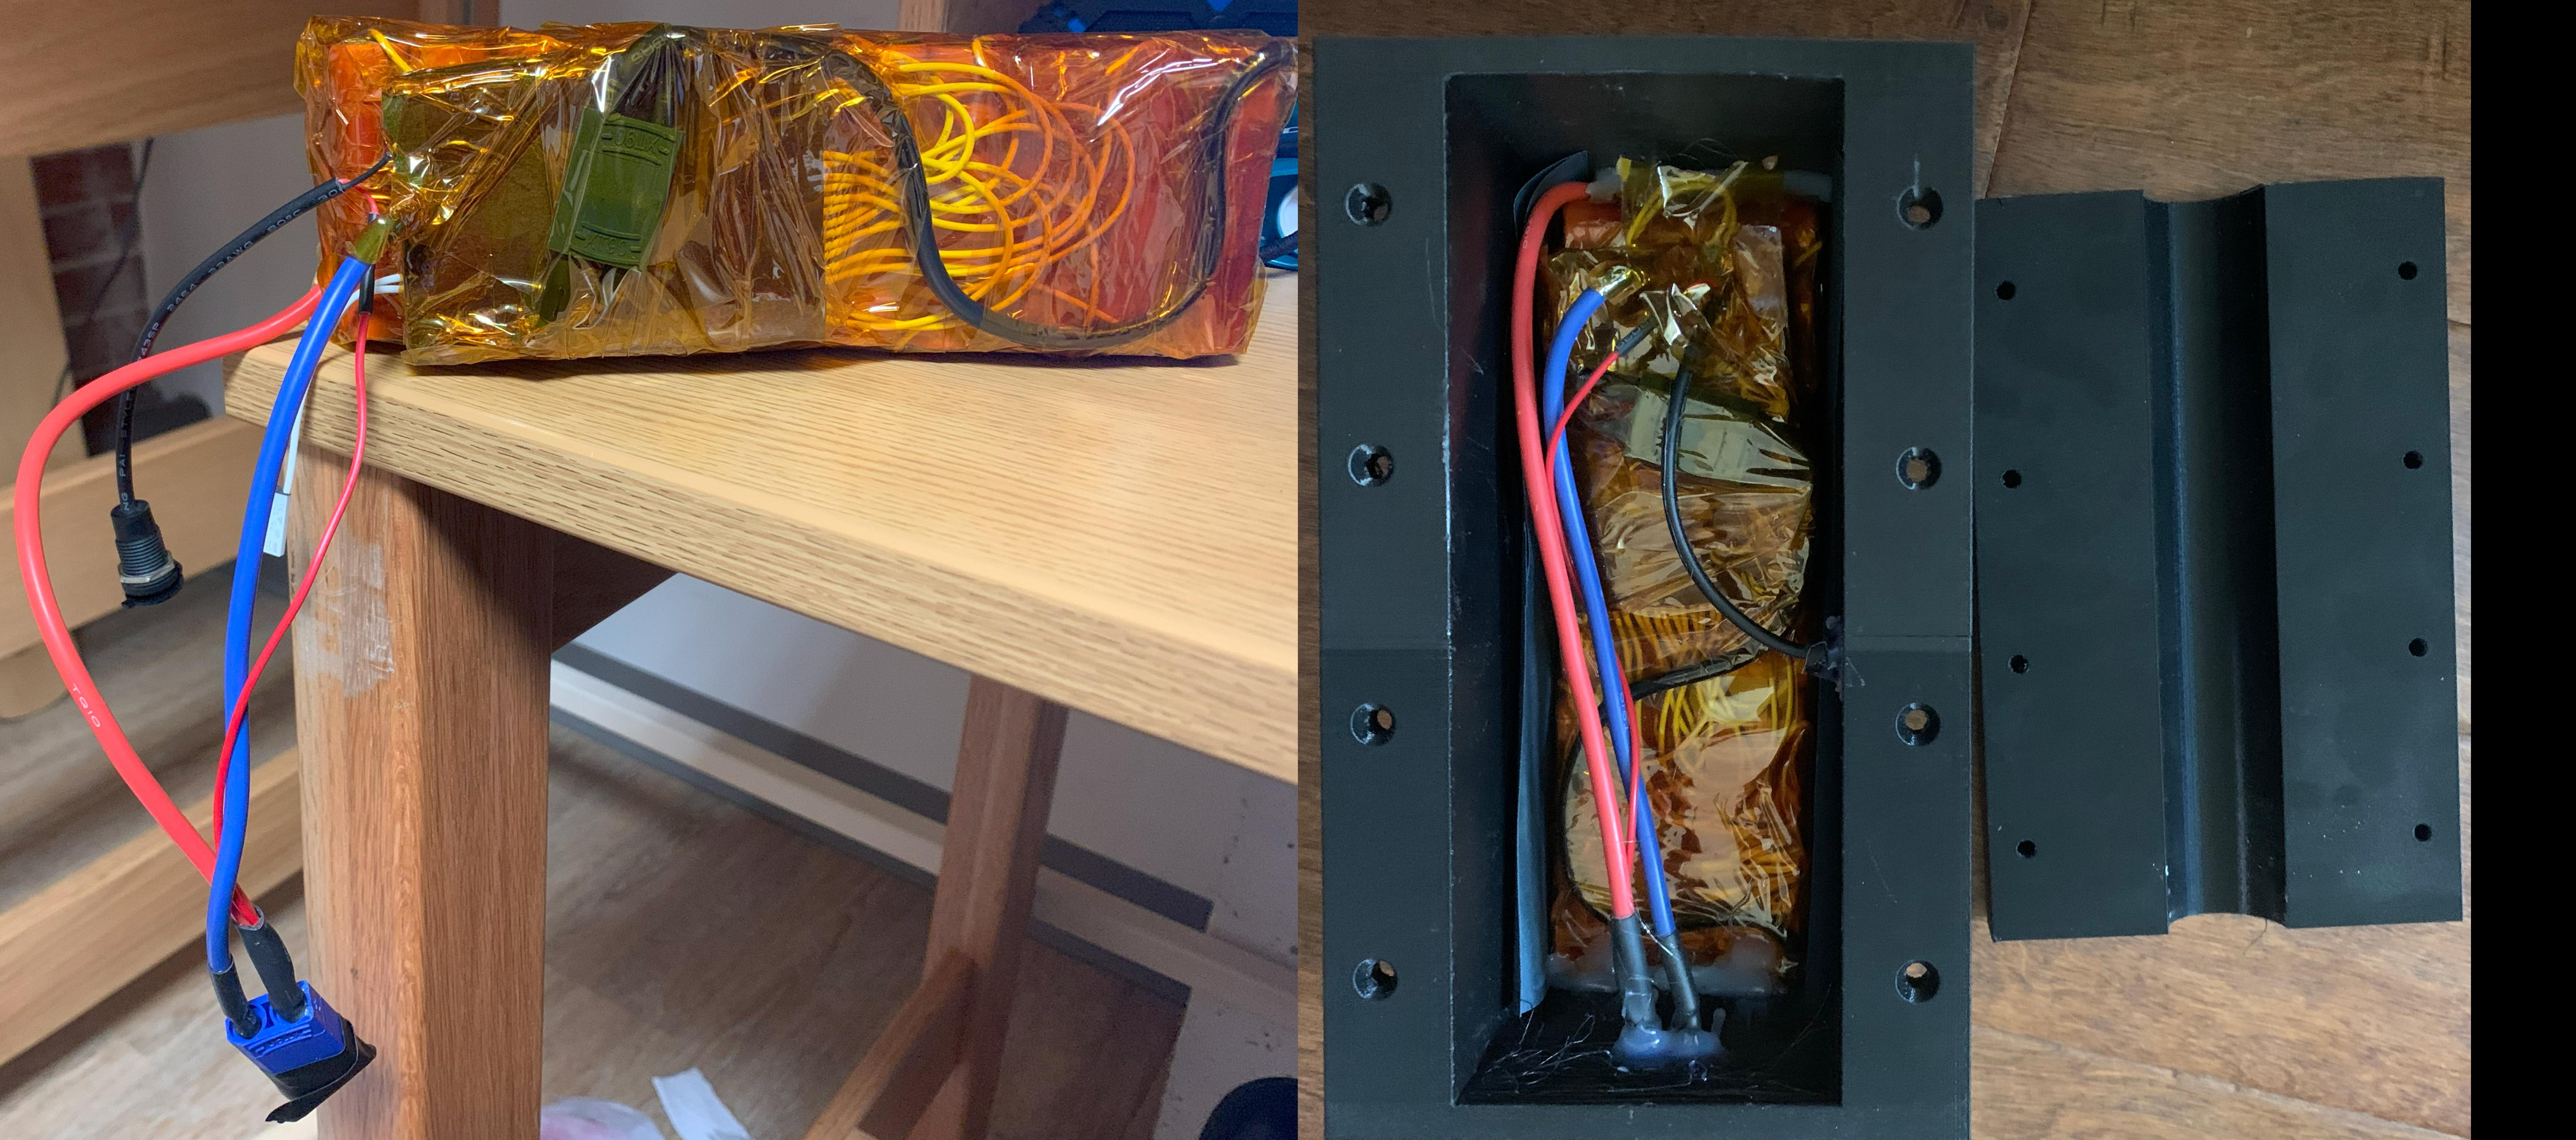 Figure 3: On left is the completed battery and image on the right is the battery inside of the 3D printed box.
Assembly
I removed the front wheel of my old bicycle and took of the tire. I put the tire on the motorized wheel and attached the motroized wheel to the bicycle frame. I removed my old handles and brakes and added the electric brakes and handles with the throttle. I screwed the control box and battery box to the bicycle frame.
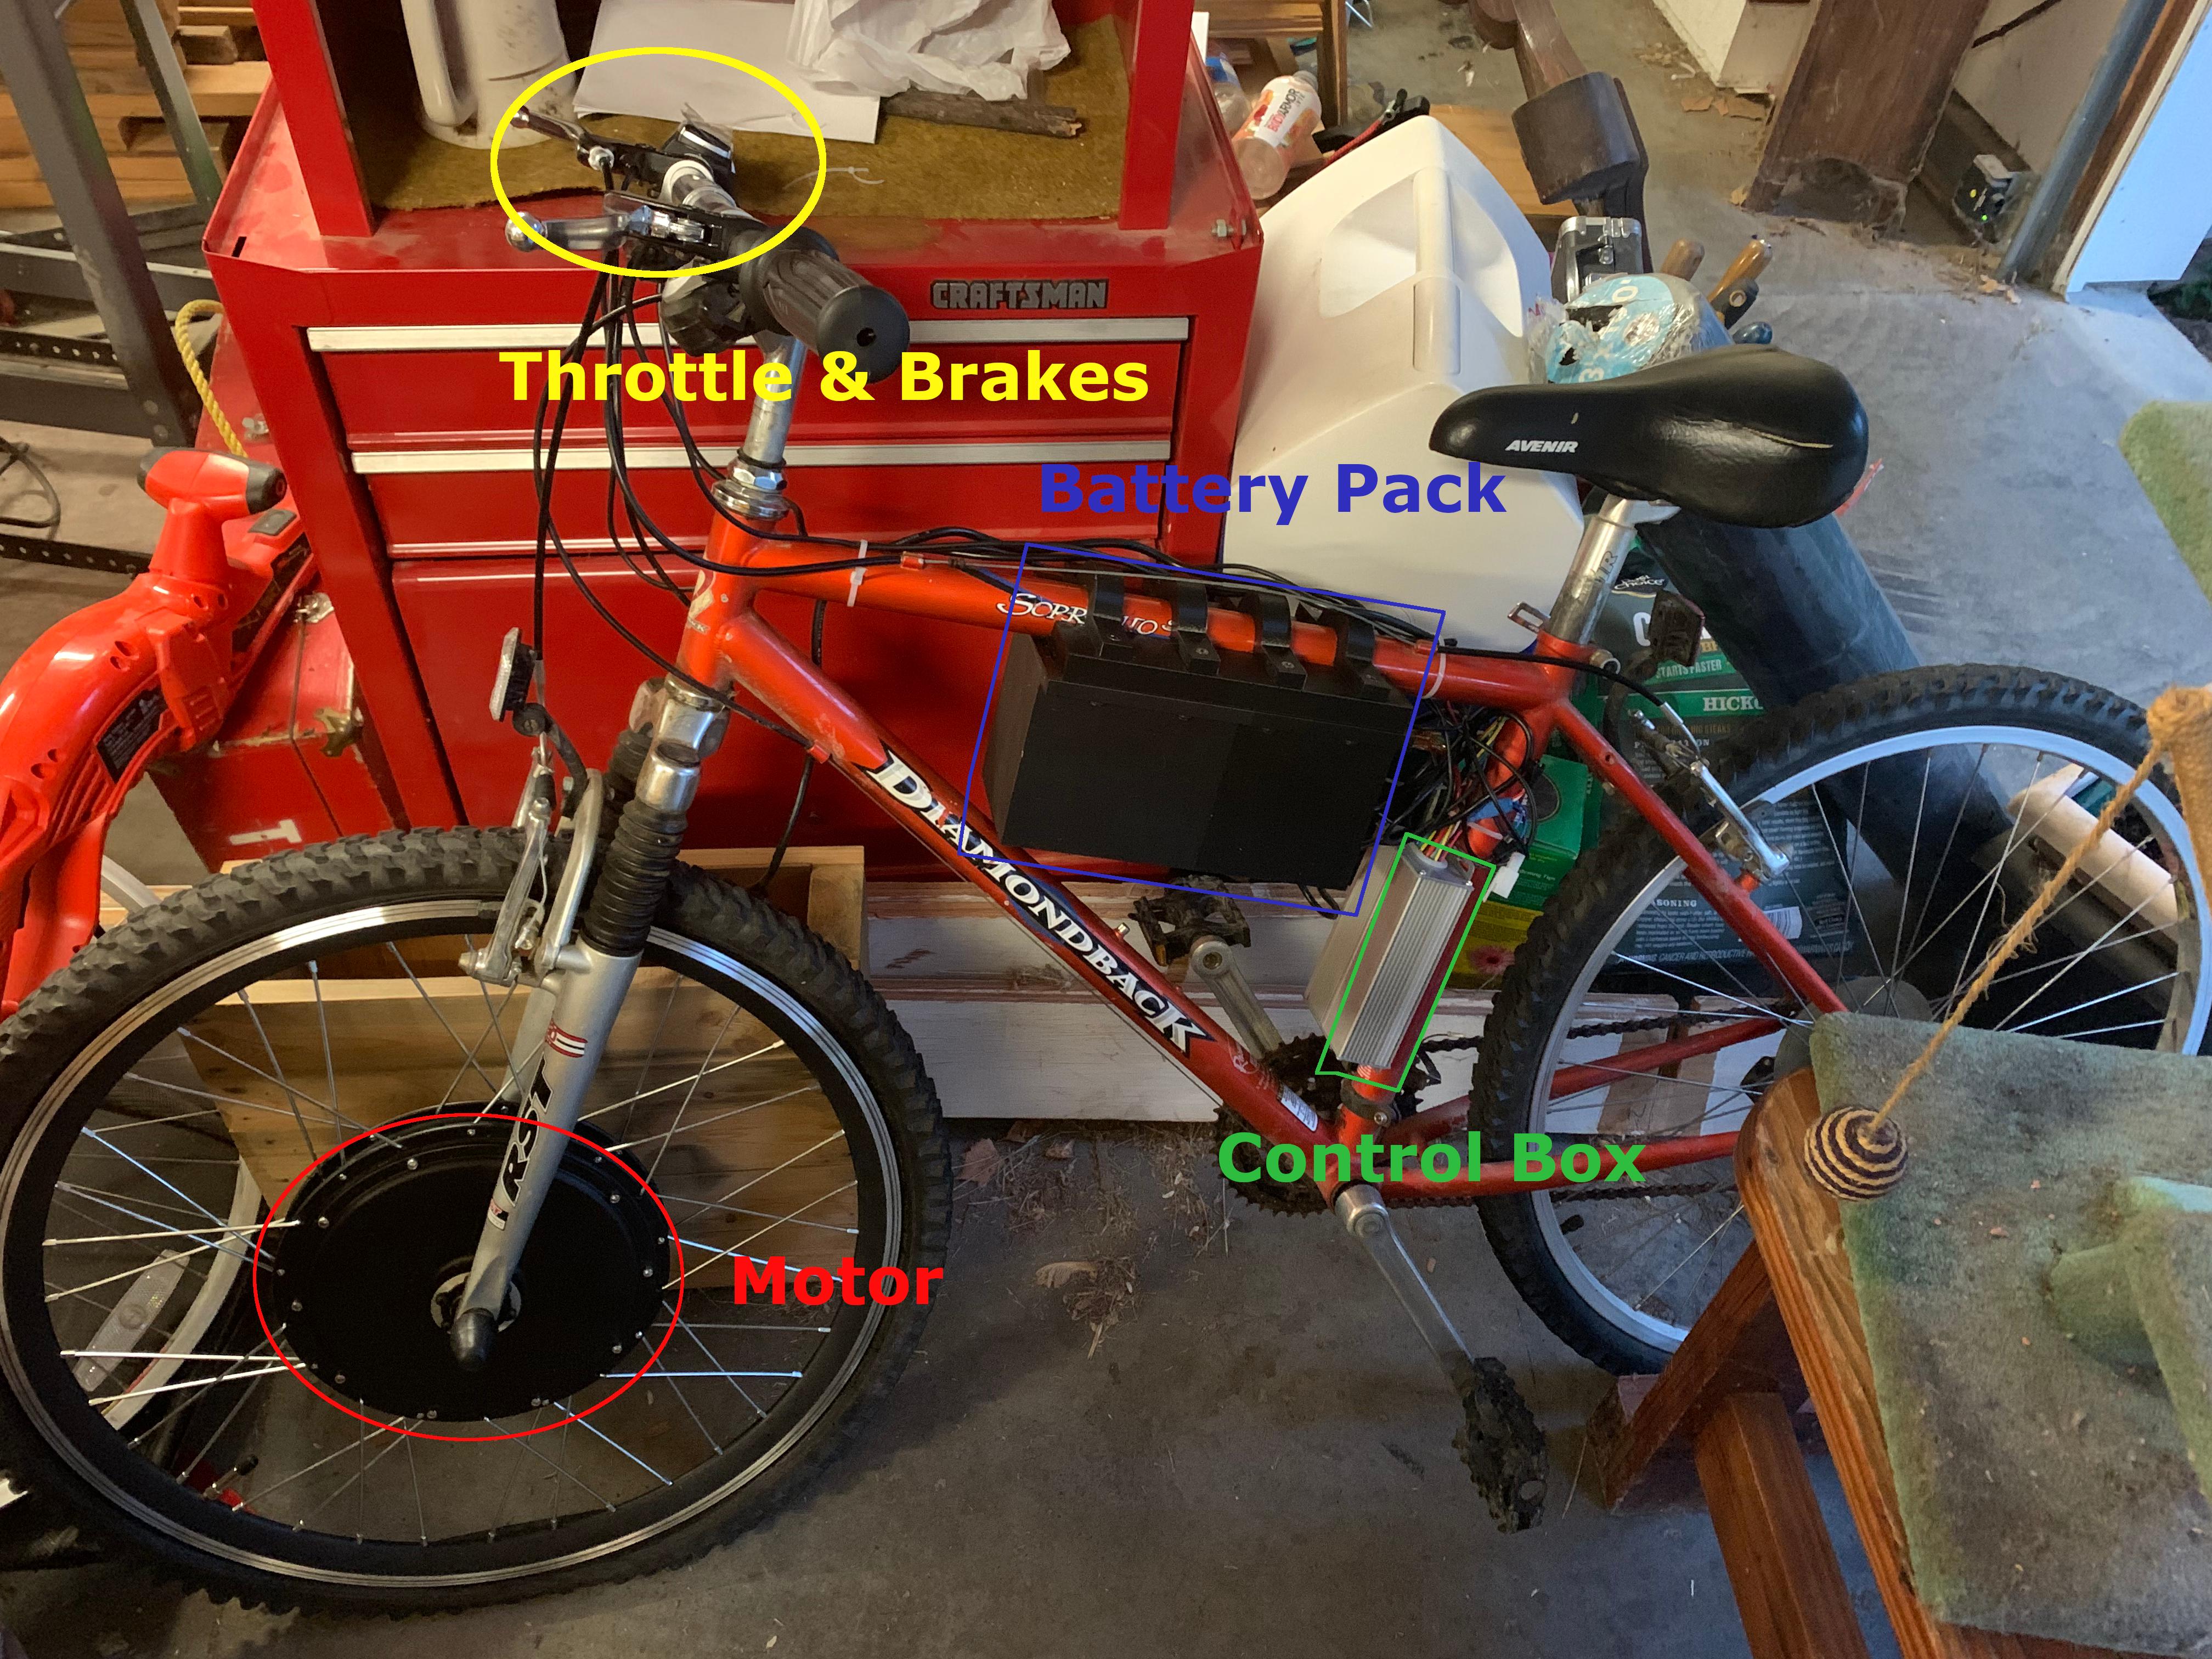 Figure 4: Finished Electric Bicycle
Performance and Future
The electric throttle came with a small screen had a speedometer and battery gauge. The bicycle top speed was 24mph on flat ground without peddling. The range capabilities of the bicycle were untested before it was damaged, which is explained in the paragraph below.
When the battery was fully charged, the battery gauge did not show the battery at full charge. I was curious if the battery pack wasn’t reaching full charge, so I wanted to test the voltage. But with everything assembled, I did not want to take it apart, so I decided I would test the voltage through the chargeing port with a multimeter. One of the probes on the multimeter touched both terminals on the charging port causing a short. There was a spark and a pop, and the gauge no longer showed anything. I took the battery off the bicycle and measured the voltage of the battery. The battery voltage was fine without BMS but not with it, so something in the BMS is damaged. My current hypothesis is that the battery pack had a max voltage of 46V and the electric motor kit was made for a 48V pack, so this may have been the reason for the gauge never showing 100% at full charge.
In the future I plan to replace the BMS, but I ended up glueing the battery into the 3D printed box, so removing the BMS and battery safely will be difficult. It might be safer and more time effiecent to replace the battery, but it would waste potentially good cells.